Ubuntu 16.10 released with a support of 9 months until July 2017 and Ubuntu 16.04 has been released in wild by Canonical with a life circle of 5 years support.
This tutorial will guide you on how you can perform the installation of Ubuntu 16.10 and Ubuntu 16.04 in dual-boot with a Microsoft Operating System on machines that come pre-installed with Windows 10.
For fresh Ubuntu 16.04/16.10 installation, read our article about Ubuntu 16.04 Desktop Installation Guideand Ubuntu 16.10 Installation Guide
This guide assumes that your machine comes pre-installed with Windows 10 OS or an older version of Microsoft Windows, such as Windows 8.1 or 8.
In case your hardware uses UEFI then you should modify the EFI settings and disable Secure Boot feature.
If your computer has no other Operating System already installed and you plan to use a Windows variant alongside Ubuntu 16.04/16.10, you should first install Microsoft Windows and then proceed with Ubuntu 16.04 installation.
In this particular case, on Windows installation steps, when formatting the hard disk, you should allocate a free space on the disk with at least 20 GB in size in order use it later as a partition for Ubuntu installation.
Requirements
Download Ubuntu 16.04 and Ubuntu 16.10 ISO Image as per your system architecture using following link:
Step 1: Prepare Windows Machine for Dual-Boot
1. The first thing you need to take care is to create a free space on the computer hard disk in case the system is installed on a single partition.
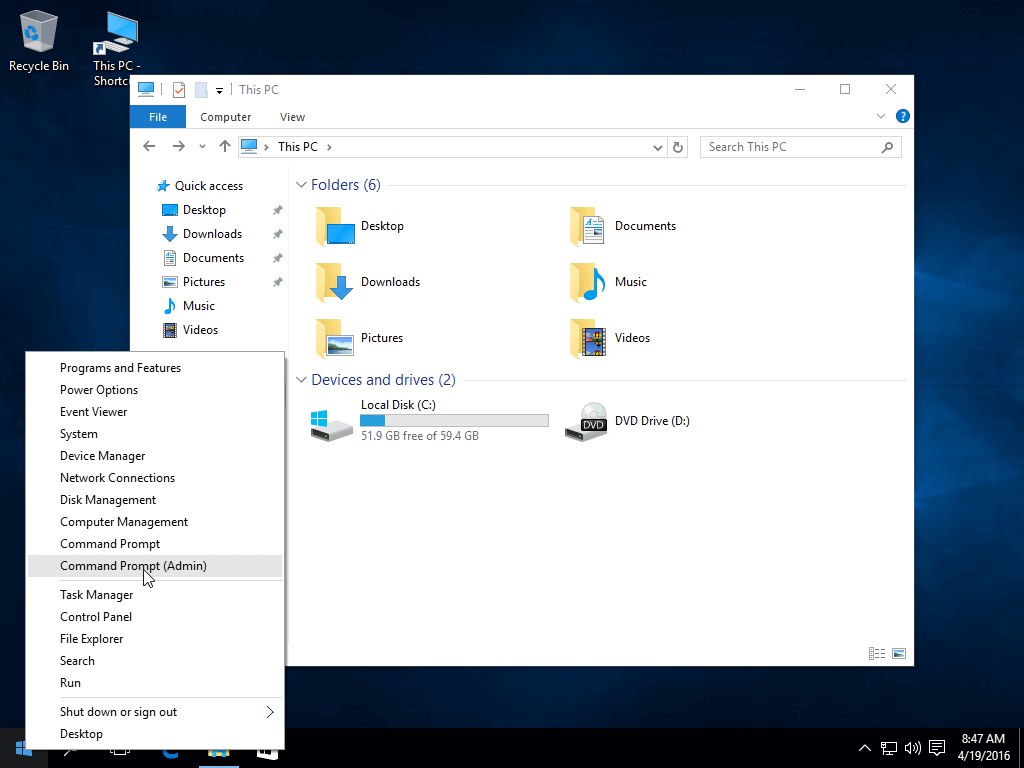
Login to your Windows machine with an administrative account and right click on the Start Menu -> Command Prompt (Admin) in order to enter Windows Command Line.
Preparing Windows for Dual-Boot with Ubuntu 16.04
2. Once in CLI, type
diskmgmt.msc on prompt and the Disk Management utility should open. From here, right click on C: partition and select Shrink Volume in order to resize the partition.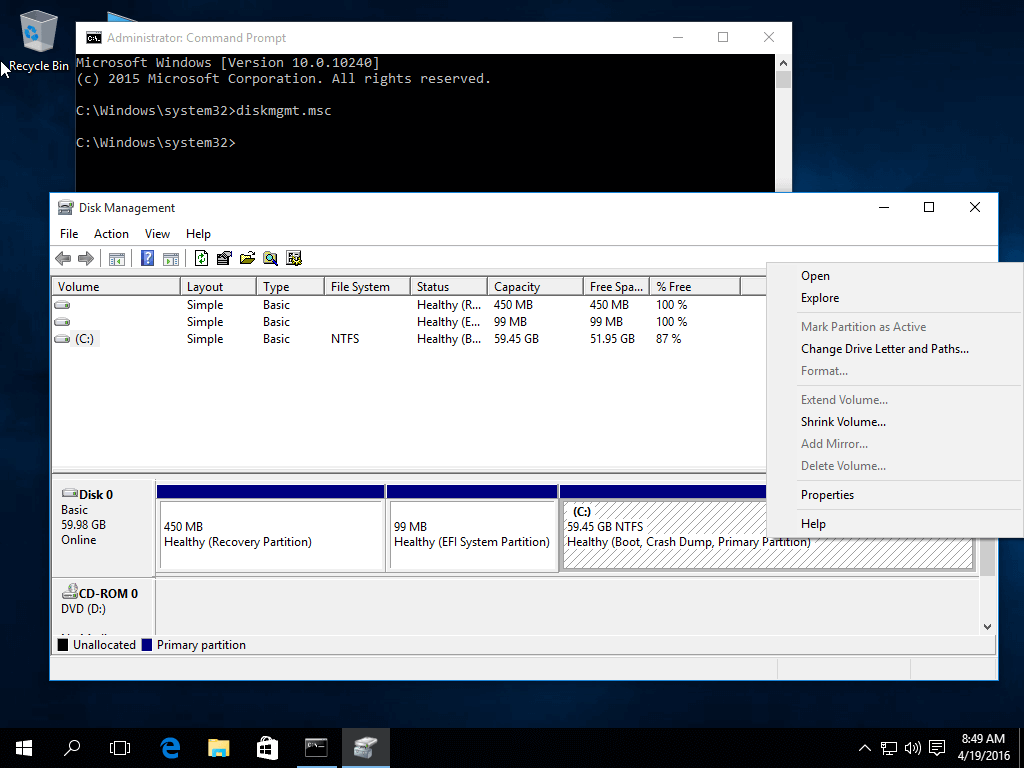
Shrink Volume to Resize Partition
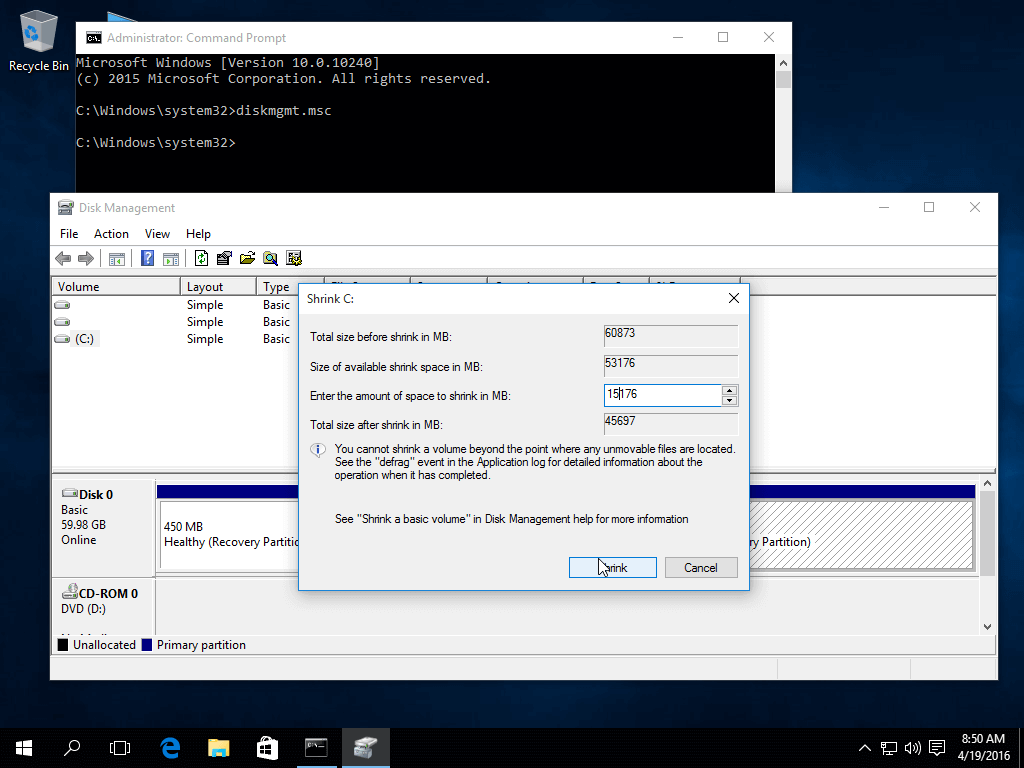
3. On Shrink
C: enter a value on space to shrink in MB (use at least 20000 MB depending on the C: partition size) and hit Shrink to start partition resize as illustrated below (the value of space shrink from below image is lower and only used for demonstration purposes).
Once the space has been resized you will see a new unallocated space on the hard drive. Leave it as default and reboot the computer in order to proceed with Ubuntu 16.04 installation.
Create Windows Partition for Ubuntu 16.04 Installation
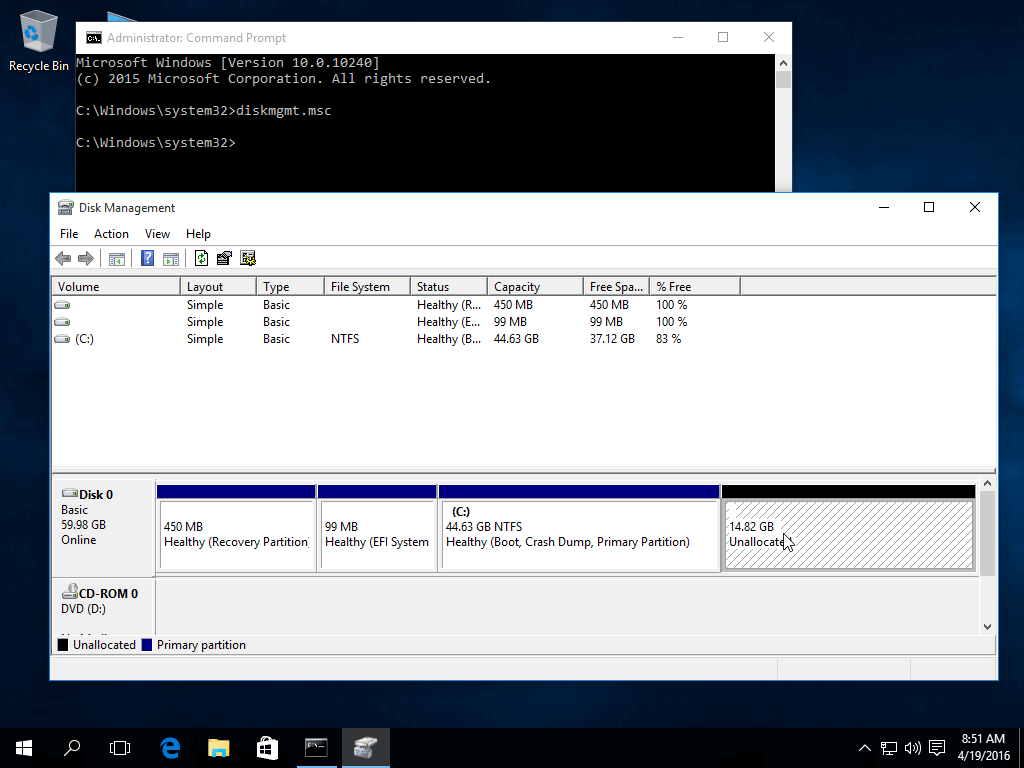
Windows Partition for Dual Boot Ubuntu 16.04
Step 2: Install Ubuntu 16.04 with Windows Dual-Boot
4. Now it’s time to install Ubuntu 16.04. Go the download link from the topic description and grab Ubuntu Desktop 16.04 ISO image.
Burn the image to a DVD or create a bootable USB stick using a utility such as Universal USB Installer (BIOS compatible) or Rufus (UEFI compatible).
Place the USB stick or DVD in the appropriate drive, reboot the machine and instruct the BIOS/UEFI to boot-up from the DVD/USB by pressing a special function key (usually F12, F10 or F2 depending on the vendor specifications).
Once the media boot-up a new grub screen should appear on your monitor. From the menu select Install Ubuntuand hit Enter to continue.
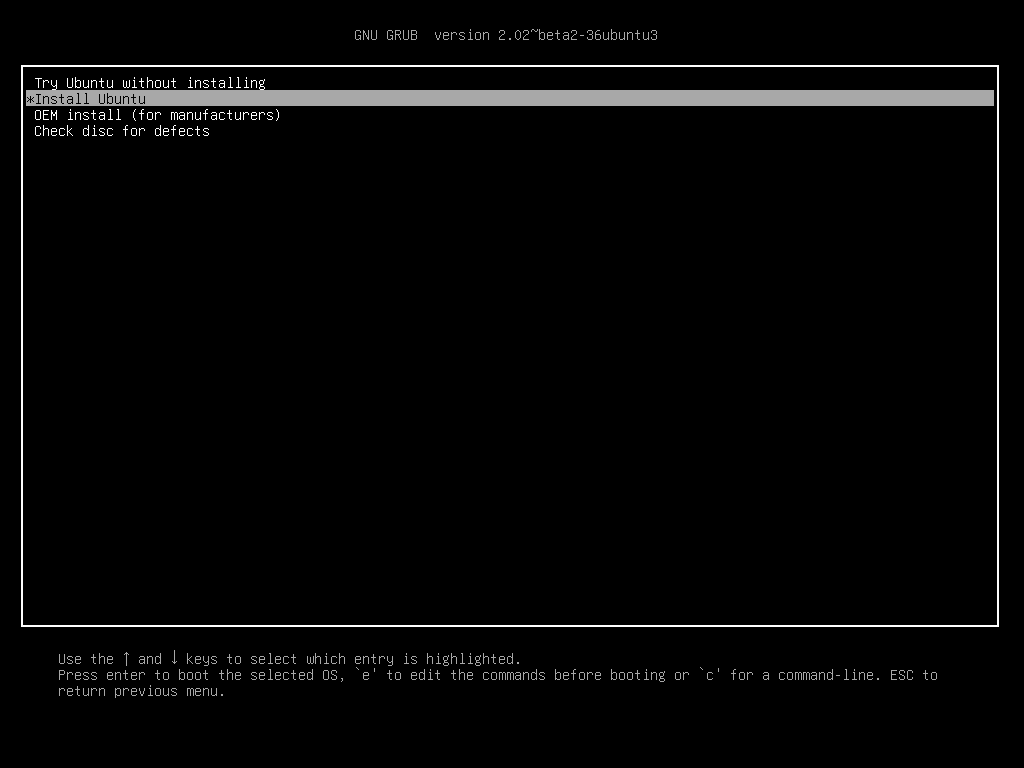
Ubuntu 16.04 Install Boot Screen
5. After the boot media finishes loading into RAM you will end-up with a completely functional Ubuntu system running in live-mode.
On the Launcher hit on the second icon from top, Install Ubuntu 16.04 LTS, and the installer utility will start. Choose the language you wish to perform the installation and click on Continue button to proceed further.
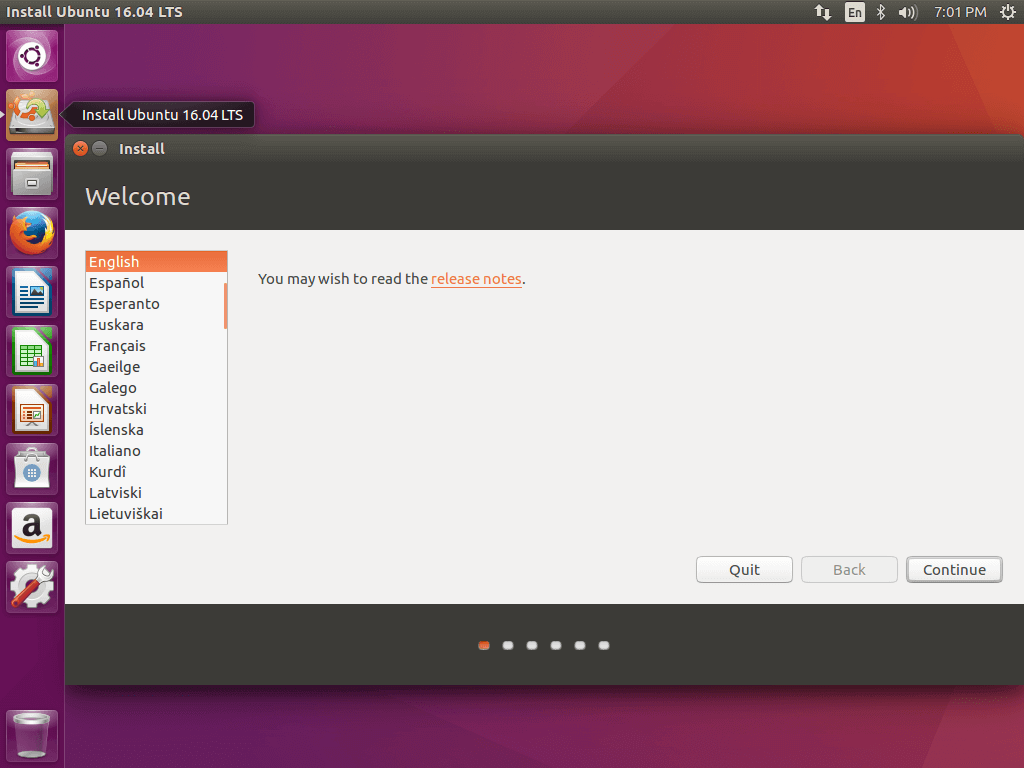
Select Ubuntu 16.04 Installation Language
6. Next, leave both options from Preparing to Install Ubuntu unchecked and hit on Continue button again.

Preparing Ubuntu 16.04 Installation
7. Now it’s time to select an Installation Type. You can choose to Install Ubuntu alongside Windows Boot Manager, option that will automatically take care of all the partition steps.
Use this option if you don’t require personalized partition scheme. In case you want a custom partition layout, check the Something else option and hit on Continue button to proceed further.
The option Erase disk and install Ubuntu should be avoided on dual-boot because is potentially dangerous and will wipe out your disk.
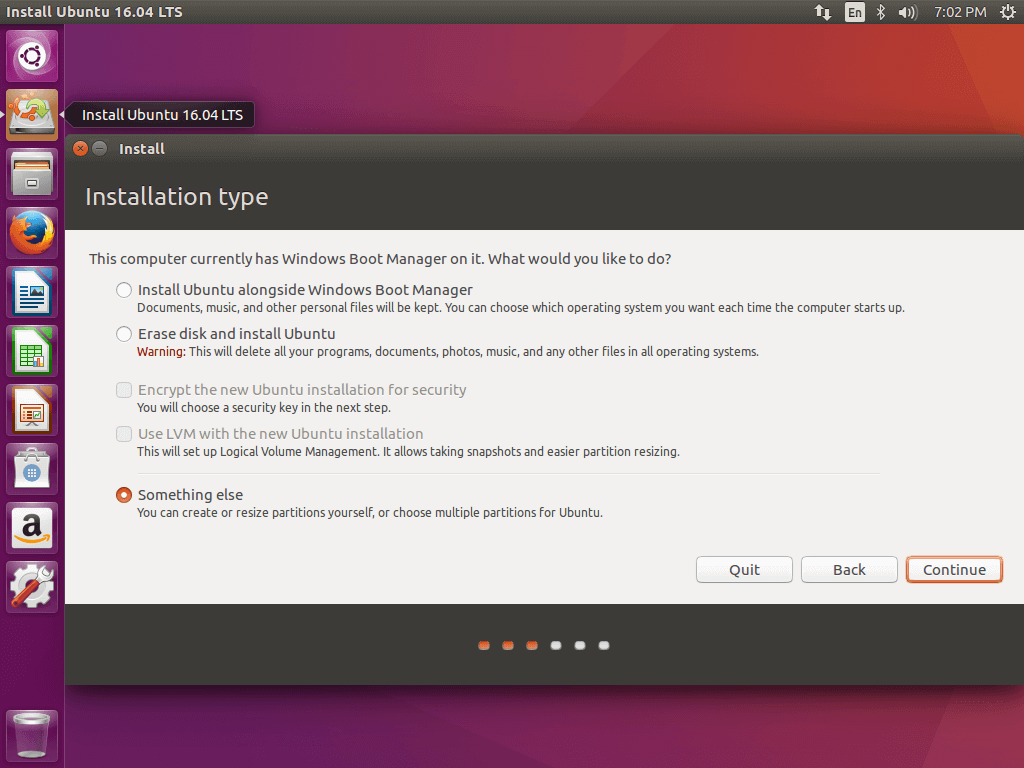
Select Ubuntu 16.04 Installation Type
8. On this step we’ll create our custom partition layout for Ubuntu 16.04. On this guide will recommend that you create two partitions, one for
root and the other for home accounts data and no partition for swap (use a swap partition only if you have limited RAM resources or you use a fast SSD).
To create the first partition, the
root partition, select the free space (the shrink space from Windows created earlier) and hit on the + icon below. On partition settings use the following configurations and hit OK to apply changes:- Size = at least 20000 MB
- Type for the new partition = Primary
- Location for the new partition = Beginning
- Use as = EXT4 journaling file system
- Mount point = /
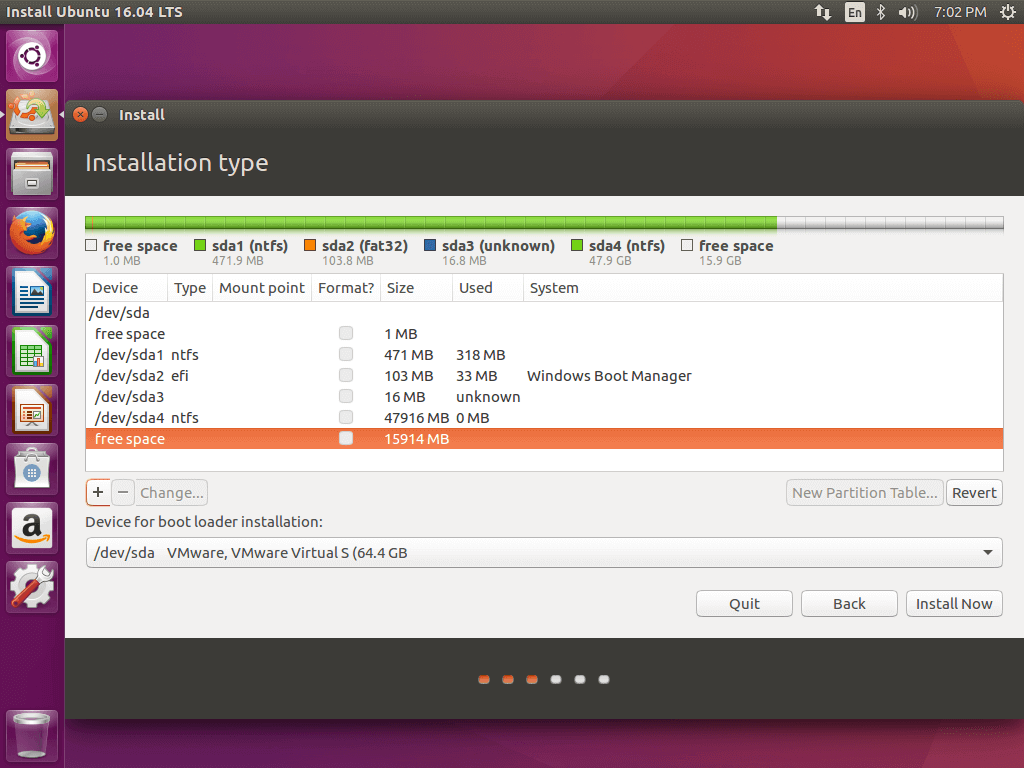
Create Ubuntu 16.04 Partitions

Create Root Partition for Ubuntu 16.04
Create the
home partition using the same steps as above. Use all the available free space left for home partition size. The partition settings should look like this:- Size = all remaining free space
- Type for the new partition = Primary
- Location for the new partition = Beginning
- Use as = EXT4 journaling file system
- Mount point = /home
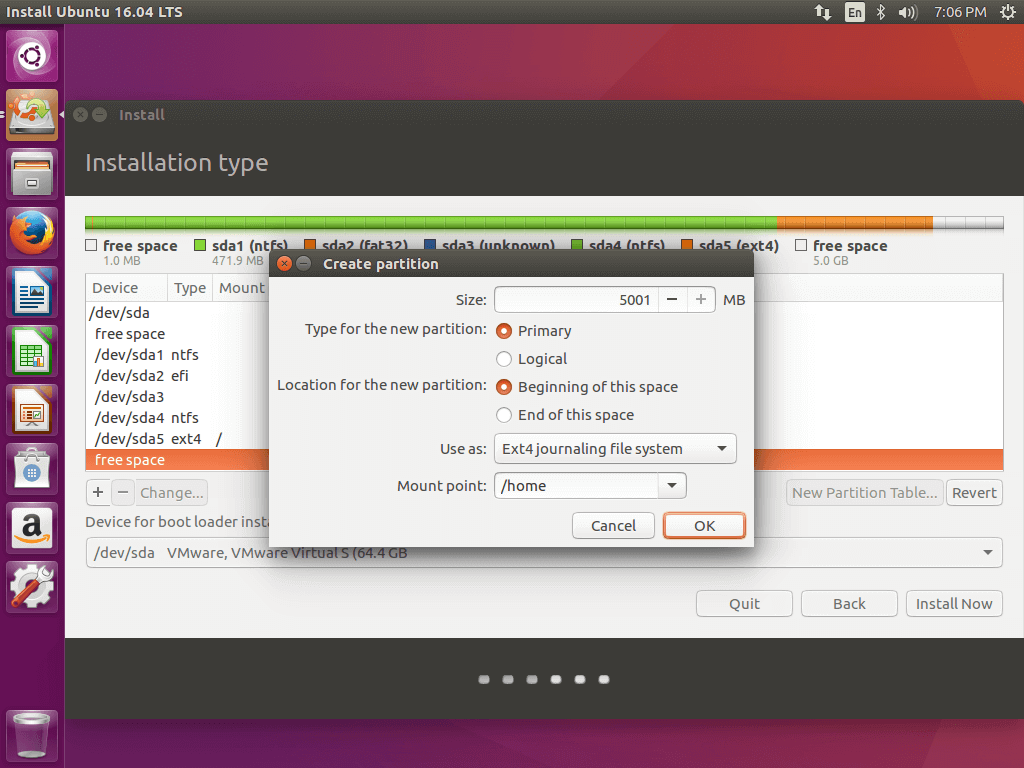
Create Home Partition for Ubuntu 16.04
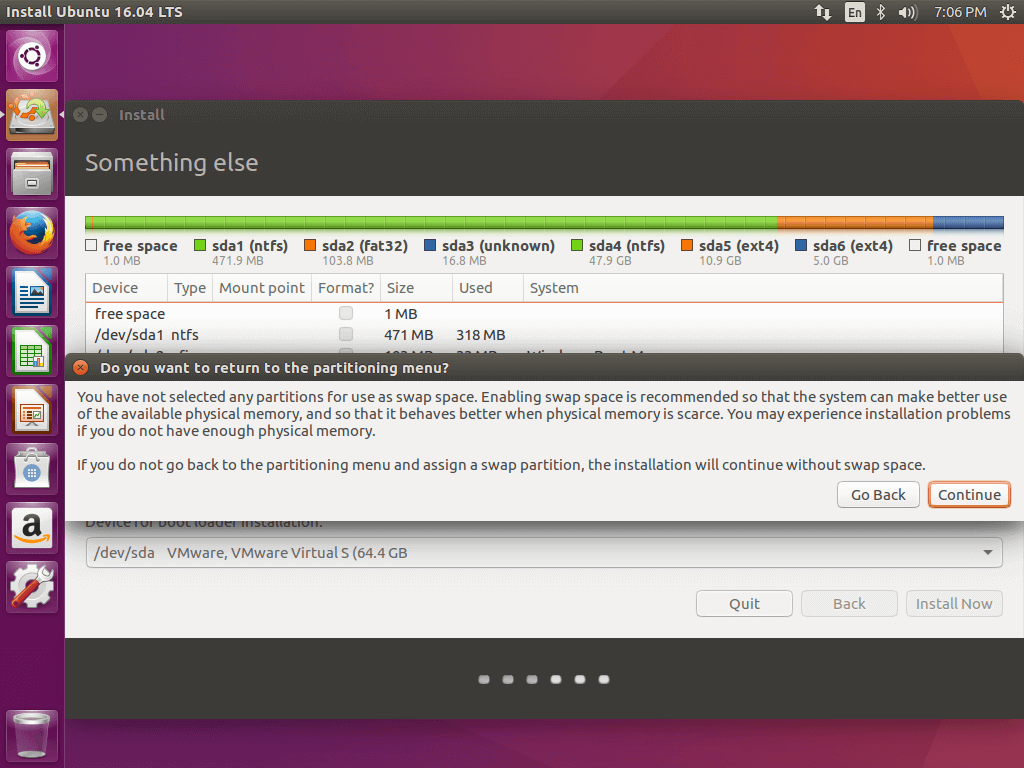
9. When finished, hit the Install Now button in order to apply changes to disk and start the installation process.
A pop-up window should appear to inform you about swap space. Ignore the alert by pressing on Continuebutton.
Next a new pop-up window will ask you if you agree with committing changes to disk. Hit Continue to write changes to disk and the installation process will now start.
Confirm Partition Changes
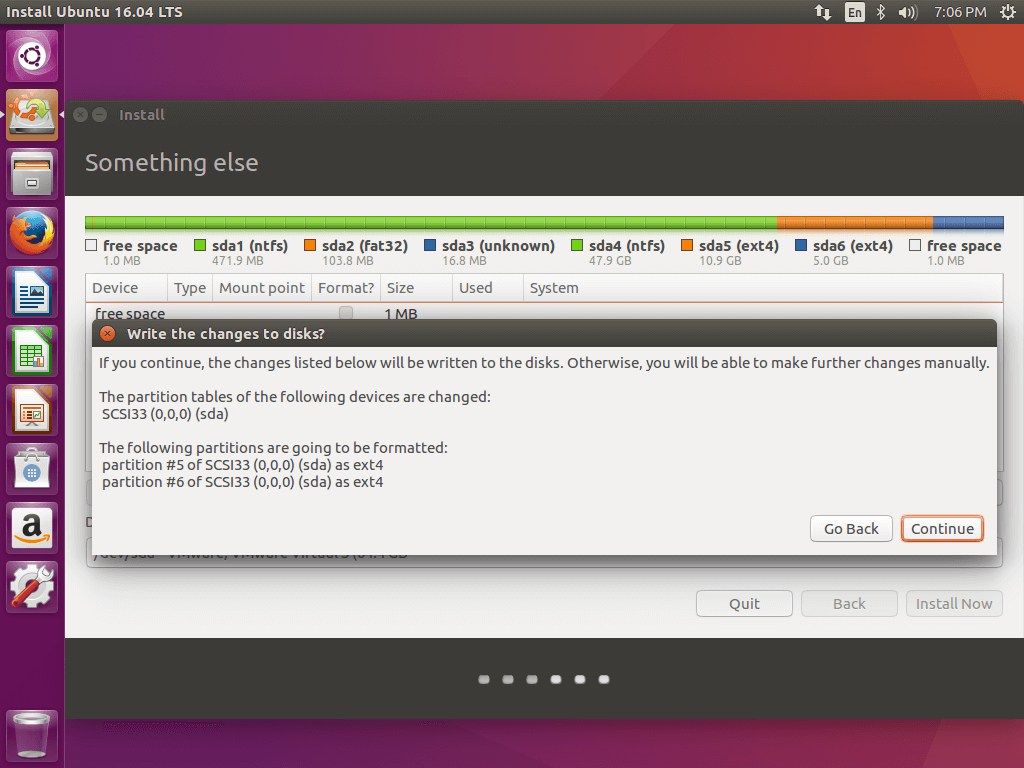
Confirm Write Changes to Disk
10. On the next screen adjust your machine physical location by selecting a city nearby from the map. When done hit Continue to move ahead.
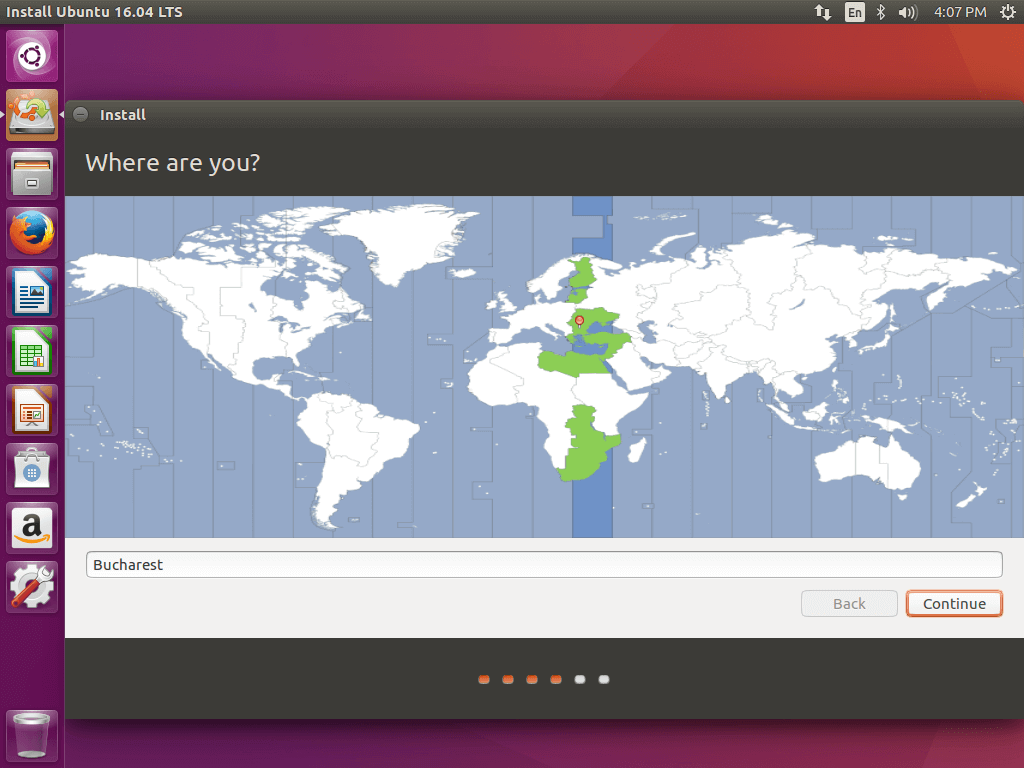
Select Your City Location
11. Next, select your keyboard layout and click on Continue button.
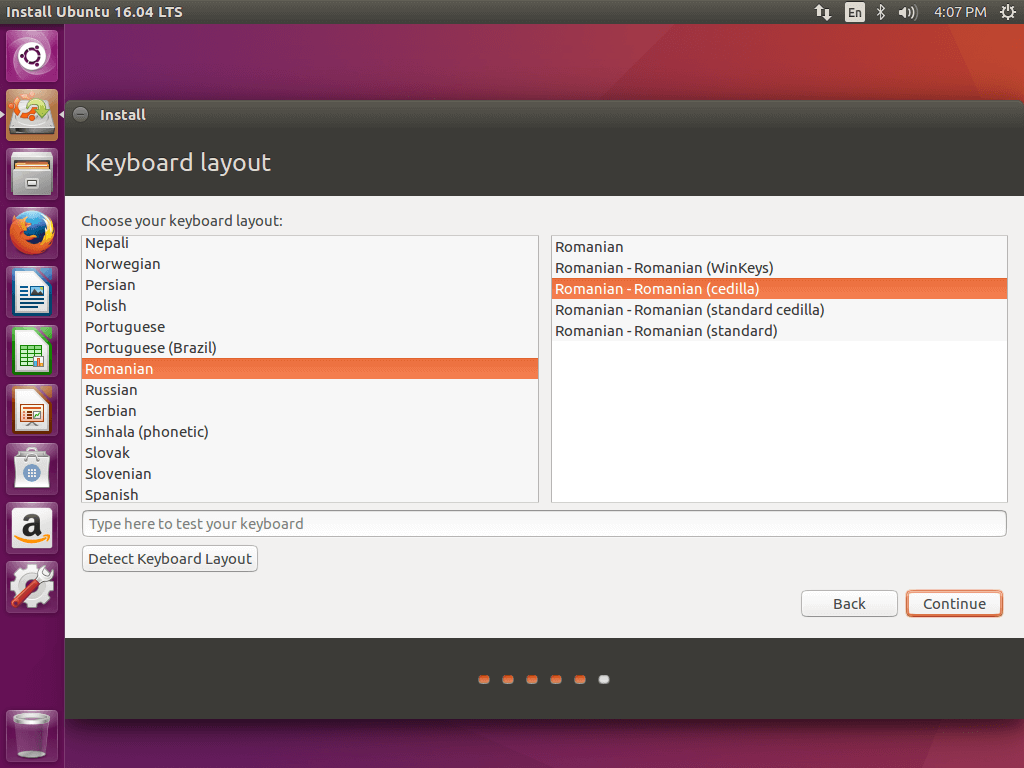
Select Keyboard Layout
12. Pick up a username and password for your administrative sudo account, enter a descriptive name for your computer and hit Continue to finalize the installation.
This are all the settings required for customizing Ubuntu 16.04 installation. From here on the installation process will run automatically until it reaches the end.
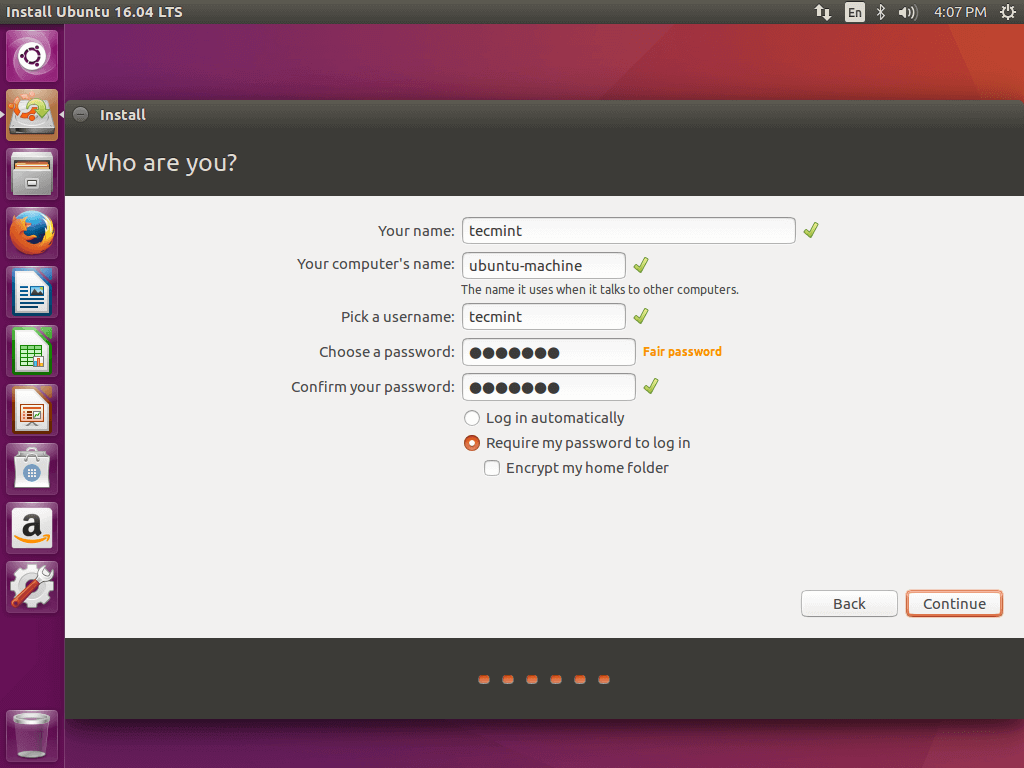
Create User Account for Ubuntu 16.04
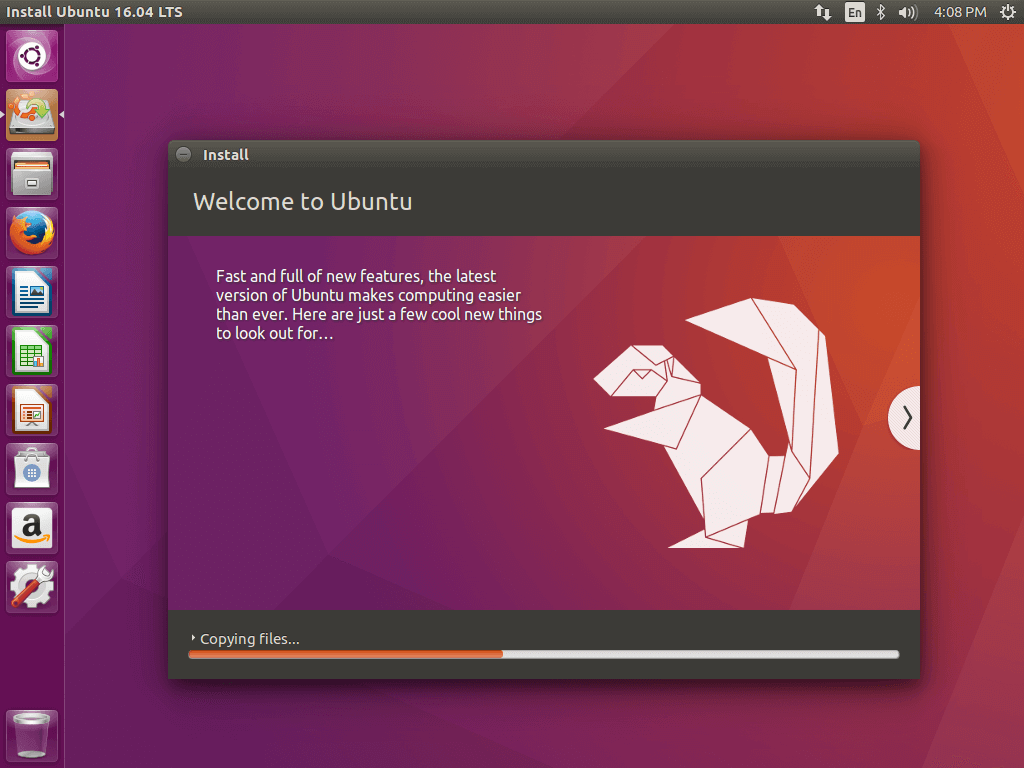
Ubuntu 16.04 Installation Process
13. After the installation process reaches its end hit on Restart Now button in order to complete the installation.
The machine will reboot into the Grub menu, where for ten seconds, you will be presented to choose what OS you wish to use further: Ubuntu 16.04 or Microsoft Windows.
Ubuntu is designated as default OS to boot from. Thus, just press Enter key or wait for those 10 seconds timeout to drain.

Ubuntu 16.04 Installation Completed
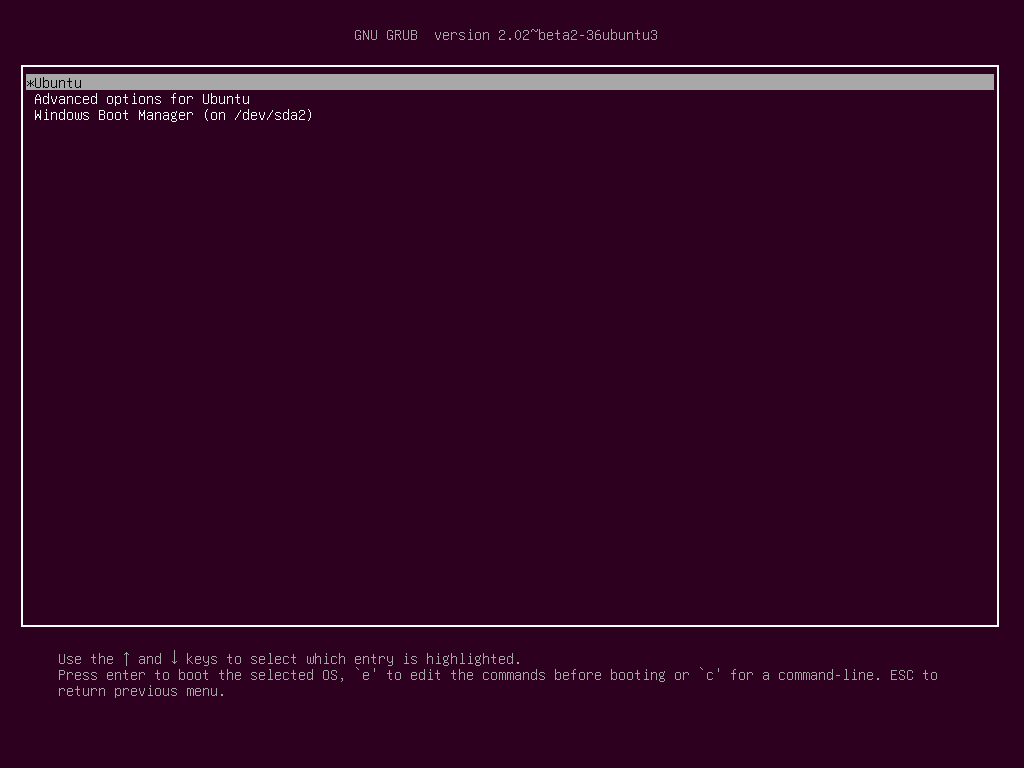
Grub Menu Select Ubuntu or Windows to Boot
14. After Ubuntu finishes loading, login with the credentials created during the installation process and enjoy it. Ubuntu 16.04 provides NTFS file system support automatically so you can access the files from Windows partitions just by clicking on the Windows volume.
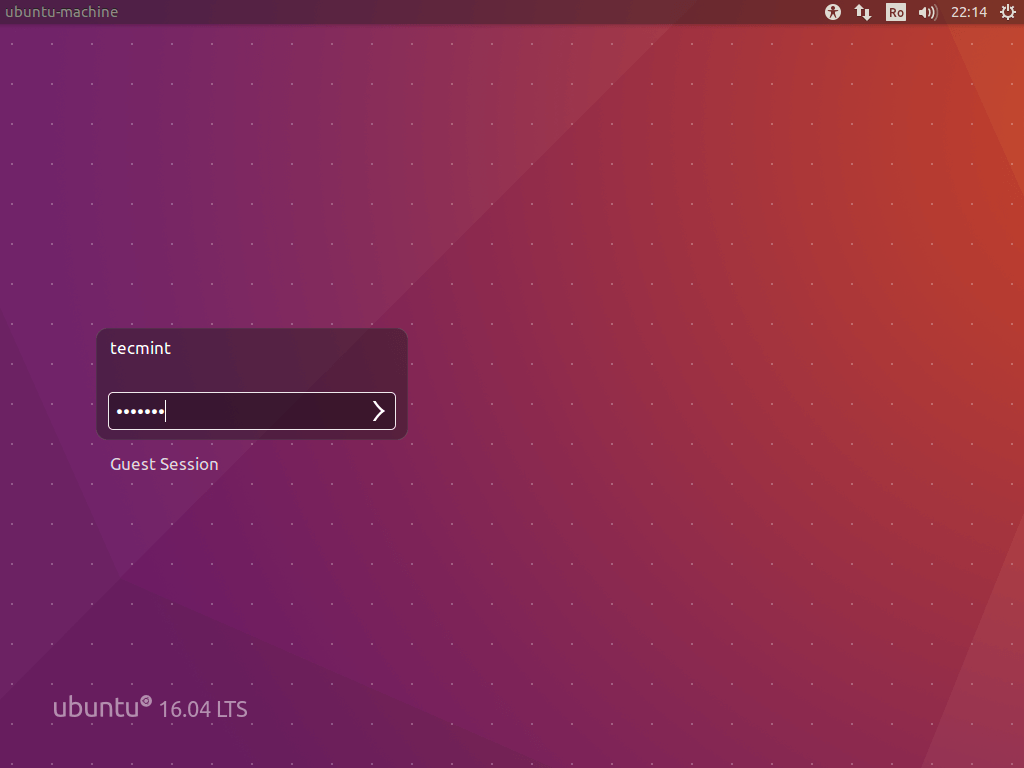
Ubuntu 16.04 Login

Access Windows Partitions from Ubuntu 16.04
That’s it! In case you need to switch back to Windows, just reboot the computer and select Windows from the Grub menu.
If you want to install some additional software packages and customize Ubuntu 16.04, then read our article Top 7 Things to Do After Ubuntu 16.04 Installation.
Sign up here with your email


EmoticonEmoticon